


Dwarven Hollows, Molten Cave & Subterranean Lake
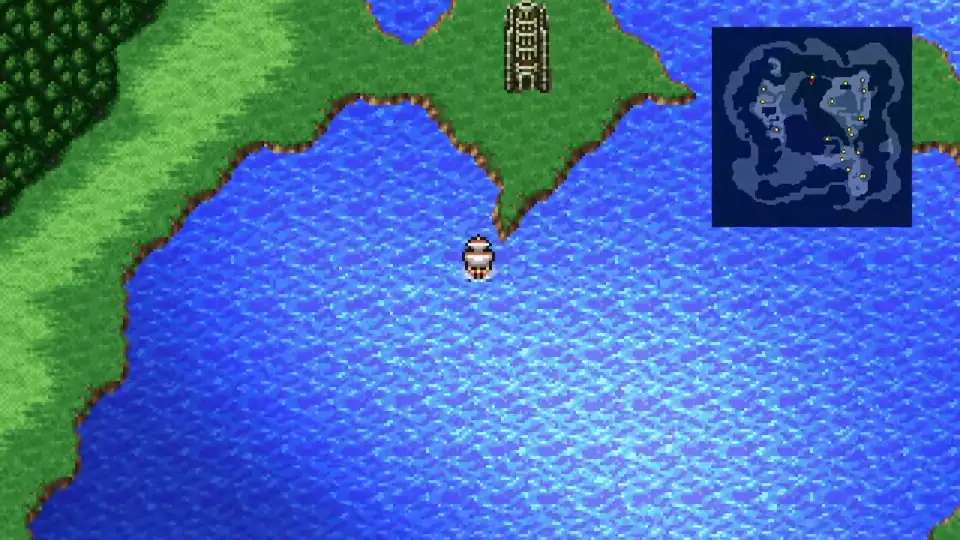
The whirlpool is gone. Desch’s sacrifice at the Tower of Owen opened the outer sea, and you can now sail north past it to the dwarves’ island. This is a long chapter: 30 chests across three dungeons, 17 new bestiary entries, 3 items, 2 boss fights, and 4 missable sea enemies.
Missable Sea Enemies
New Enemies (*Missable)

All four are weak to Lightning, so Thundara ends each fight in one cast. Sea Serpent has the most HP at 256 and is the rarest of the four; keep sailing if it hasn’t shown up. The other three sit around 180-190 HP and fold to a single -ara spell.
Dwarven Hollows
Shops
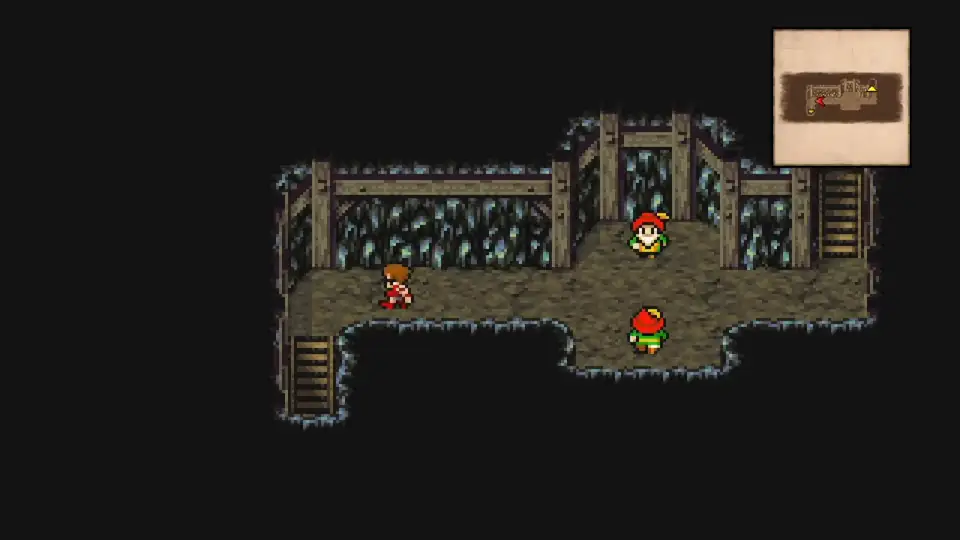
The dwarves greet you with their customary “Lali-ho!” The settlement is on B2; speak to the dwarves to learn that Gutsco stole their Horn of Ice and fled to the Subterranean Lake. The vault in the central hall is locked behind a bridge that the dwarves only open once Gutsco is dealt with.
Hit the shops before leaving:
- Weapons: The Salamand Sword (3,500 Gil) is a duplicate of the one from Tower of Owen 9F if you want a second. Ice Staff (3,500 Gil) is new and item-casts Blizzard for free, perfect for the upcoming Salamander fight. Sansetsukon (3,000 Gil) is a nunchaku upgrade for your Monk. Skip Tyrfing if you grabbed it on Tower of Owen 4F.
- Armor: Kenpo Gi (2,000 Gil) is the first Monk body upgrade (def 20). Ice Armor (2,400 Gil), Ice Helm (1,200 Gil), and Ice Shield (1,800 Gil) are flat upgrades for your Warrior that also resist Fire, which is exactly what you want for the boss ahead.
- Items: Hi-Potion (600 Gil) finally restocks reliably; pick up at least four. Phoenix Down (1,000 Gil) is on the shelf too if you’re short.
Walk west from the centre of the room and take the stairs down to the lake entrance. Cast Toad on your party to enter the water dungeon, then cast Toad again once inside to restore them.
Subterranean Lake
New Enemies


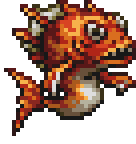


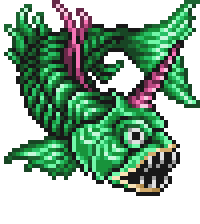
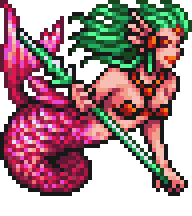
Stalagmite is the priority target on B2/B3: it casts Gazestone at 30% (the same petrify spell Medusa used), and a petrified character is dead weight until cured. Drop Stalagmites first in every encounter. Bomb (150 HP) Self-Destructs for heavy damage if left alive too long, so finish it quickly with Blizzara. Manticore casts Blizzard at 60% on a single target, so keep your back-row mages topped up. Sea Devil, Merman, and Ruinous Wave are all weak to Lightning for Thundara. Ruinous Wave has a 30% chance of Bad Breath, which dumps multiple statuses on the party; play through the ailments rather than spending a turn curing mid-fight.
B1. Go south across the bridge for a Gold Needle. Loop slightly north and right to find a required hidden passage through to B2.
B2. The next chest is right next to the passage exit: Zeus’s Wrath. Continue ahead and grab two more on the other side: a second Zeus’s Wrath and a Gold Needle. Go north for one more Gold Needle, then take the stairs down.
B3. A 300 Gil chest sits near the entrance. Continue north to a raised platform where Gutsco waits; the last 300 Gil chest is right next to him. Grab the chest, heal up, and trigger the fight when you’re ready.
With B3 cleared, climb the raised platform north for the boss encounter.
How to Beat Gutsco
Gutsco drops the Horn of Ice.
Backtrack out of the Subterranean Lake and return to the Dwarven Hollows. At the altar, place the Horn of Ice. The shadowy figure who’s been following the party reveals himself as the real Gutsco; he grabs both horns and bolts north to the Molten Cave to reach the Fire Crystal first.
Sail to the middle of the island and walk into the ring of trees to register the Chocobo Woods location (this is the second Chocobo Woods, separate from the one near Gulgan Gulch). Continue north on foot to the Molten Cave entrance.
Molten Cave
New Enemies


Every Molten Cave enemy except Myrmecoleon is weak to Ice and Water, and they all resist Fire, exactly the opposite of what you’d expect in a fire dungeon. Blizzara wrecks the entire roster, and Red Marshmallow folds to a single Blizzara or Antarctic Wind item. Balloon Self-Destructs for huge damage if you don’t drop it fast, so prioritise Balloon kills. Adamantoise is the wall at 380 HP; physicals chip slowly, but Blizzara cuts through. Crocotta hits hard and tends to spawn in groups, so keep Cura ready.
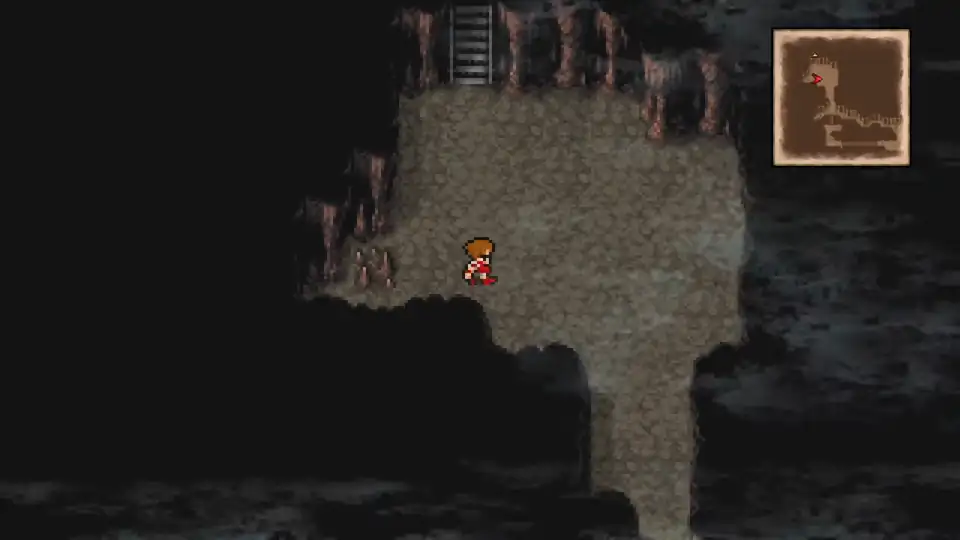
B1. Before going down, cut to the top-left corner for an Antarctic Wind. Take the stairs down, then walk through the lava. At the fork, take the right path first for a second Antarctic Wind, double back, and follow the left split down to B2.
B2. Stick to the right of the lava waterfall and go south for the Freezing Blade. Backtrack and cross under the waterfall to the left, then go southwest for Hi-Potion and back north toward the stairs, grabbing another Hi-Potion on the left.
B3. Cut left across the lava for a Potion. Go north up the straight path until you spot a rock with Hi-Potion on its right.
Open the chest, then interact with the rock to reveal the hidden path west to the Fire Crystal chamber. Heal up and save before stepping through.
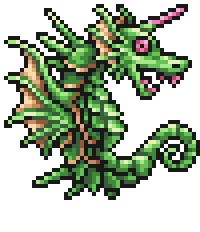
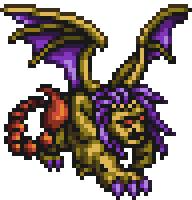
How to Beat Salamander
Fire Crystal Jobs
Salamander drops the Fang of Fire. Step up to the Fire Crystal in the chamber and interact with it.
Four new jobs unlock immediately:

A flat upgrade from Warrior with higher stats and a defensive command.
- Equips Sword, Knife, Throwing; full heavy armor + Shield
- Guard halves incoming damage on the next turn
- Cover auto-protects allies at critical HP
- Switch your Warrior over immediately

Direct upgrade from Monk with higher STR/VIT/AGI all tiered high.
- Equips Claw only, light armor
- Boost charges next turn for a doubled attack
- Kick hits all enemies at once
- Bare-fisted attack scales with level

Bow specialist for the back row. Arrows are infinite in the Pixel Remaster.
- Equips Bow and Arrow only
- Barrage fires arrows at all enemies
- High AGI for back-row safety
- Killer Bow from the dwarf vault is its first real weapon

Utility class built for the next dungeon. High INT, equips books and robes.
- Equips Book only, robes
- Study reveals an enemy's HP and current weakness
- Alchemy doubles the potency of items in battle
- Required for the next boss who shifts elemental weakness every turn
The crystal also fully heals and revives your party if you interact with it again. Use the teleporter at the top of the chamber to return to the overworld. Sail south back to the Dwarven Hollows for the rewards.
Dwarf Rewards
At the entrance to the settlement, a dying man stumbles in and warns you about the situation in Tokkul: a mage named Hein is causing havoc, and his elemental weakness shifts every turn. That’s exactly the kind of fight Scholar’s Study command was built for.
Walk down to the central hall and speak with the dwarf at the bottom of the southeastern stairs. He leads you into the vault where 16 chests sit in two rows.
Top row (left to right): Ottershroom, Gauntlets, Echo Herbs, Scholar Robe, Scholar Hat, Knight Armor, Phoenix Down, and Heroic Shield.
Bottom row (left to right): Elixir, Killer Bow, Gold Needle, Book of Fire, Book of Ice, Book of Light, Phoenix Down, and Gysahl Greens.
Equipment to swap immediately:
- Knight: Knight Armor, Gauntlets, Heroic Shield, and either the Salamand Sword or Freezing Blade.
- Scholar: Scholar Robe, Scholar Hat, and one of the three Books (Book of Fire / Ice / Light each deal that element’s damage, so swap to match the enemy you’re hitting).
- Ranger: Killer Bow for the first real upgrade over the basic Bow.
Walk back up the stairs and find the dwarf in the green hat standing next to the horns. He hands you the Magic Key, which opens locked doors and chests throughout the rest of the game.
That clears the Dwarven Hollows. Sail back to the mainland and make for Castle Hein, a one-time dungeon that locks behind you after its boss, so plan to clear it fully on the first run.