


Jobs - Final Fantasy 3
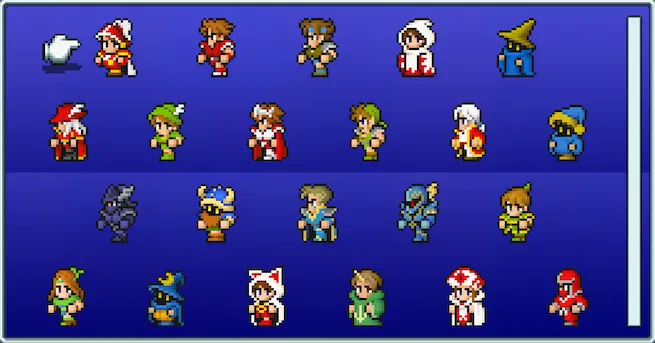
There are 22 jobs in Final Fantasy 3 Pixel Remaster, unlocked progressively as you collect the four crystals plus the optional Eureka dungeon. Every character starts as an Onion Knight and switches jobs freely between fights.
Key mechanics:
- No job change cost. No Capacity Points, no stat penalty, no adjustment period when you swap classes.
- Job Level (1-99) is tracked per job, separate from the character’s main level. Switching classes resets it to 1, so commit to a class for a stretch of fights to see the payoff.
- Job Level scales the strength, hit-count, and success rate of that job’s command (Boost stacks, Barrage shots, Sing songs, Alchemy potency, and so on).
- All four characters share the same growth curve per job, so Luneth’s Warrior gains stats identically to Arc’s Warrior. The Stats @ Lv 50 and Stats @ Lv 99 lines on each job below are the exact universal values.
The Onion Knight is the curve outlier and worth calling out: stats grow at roughly 1 point per 10 levels through Lv 89, then jump to +7 per level from Lv 90 onward, hitting 94 across every stat at Lv 99, far ahead of any specialist. The full Onion gear set (Sword, Shield, Helm, Armor, Gauntlets) drops only from the rare Yellow, Green, and Red Dragons in Crystal Tower (one different piece per dragon, so the full set takes all three).
Onion Knight
Onion Knight
Default Crystal
The starting class on every character. Stats grow by roughly 1 point per 10 levels through Lv 89, then jump to +7 per level from Lv 90 onward, hitting 94 across every stat at Lv 99 - out-scaling every other job at endgame. The full Onion gear drops only from the three rare dragons in the Crystal Tower: Yellow Dragon drops Onion Sword / Shield / Helm, Green Dragon drops Onion Sword / Shield / Gauntlets, Red Dragon drops Onion Sword / Shield / Armor.
| Weapons | Arrow, Bow, Knife, Sword |
|---|---|
| Armor | Body, Gloves, Helm, Shield |
| Stats @ Lv 50 | STR 5 · VIT 5 · AGI 5 · INT 5 · SPR 5 |
| Stats @ Lv 99 | STR 94 · VIT 94 · AGI 94 · INT 94 · SPR 94 |
 Wind Crystal Jobs
Five jobs unlocked in the Altar Cave by the Wind Crystal: the two physical core roles plus the three core magic specialists.
Warrior
Wind Crystal
Front-line physical class. Equips swords, axes, and heavy body/helm/shield/gloves. No special command. Knight is its direct upgrade at the Fire Crystal.
| Weapons | Arrow, Bow, Knife, Sword |
|---|---|
| Armor | Body, Gloves, Helm, Shield |
| Stats @ Lv 50 | STR 35 · VIT 29 · AGI 24 · INT 21 · SPR 21 |
| Stats @ Lv 99 | STR 66 · VIT 58 · AGI 47 · INT 40 · SPR 40 |
Monk
Wind Crystal
Bare-fisted class. Equips claws and light armor. Promotes to Black Belt at the Fire Crystal.
| Weapons | Nunchaku |
|---|---|
| Armor | Body, Gloves, Helm, Shield |
| Stats @ Lv 50 | STR 43 · VIT 33 · AGI 35 · INT 17 · SPR 21 |
| Stats @ Lv 99 | STR 80 · VIT 66 · AGI 66 · INT 33 · SPR 40 |
Red Mage
Wind Crystal
Hybrid caster, Lv1-5 White and Black. Equips swords and medium armor. Sits between dedicated mages and physical jobs.
| Weapons | Arrow, Bow, Knife, Rod, Staff, Sword |
|---|---|
| Armor | Body, Gloves, Helm, Shield |
| Magic | White Lv 5, Black Lv 5 |
| Stats @ Lv 50 | STR 29 · VIT 29 · AGI 24 · INT 24 · SPR 24 |
| Stats @ Lv 99 | STR 58 · VIT 58 · AGI 47 · INT 47 · SPR 47 |
| MP slots @ Lv 99 | 26 / 15 / 10 / 8 / 4 / 0 / 0 / 0 |
White Mage
Wind Crystal
Dedicated White Magic, Lv1-7. Equips staves and robes. Devout at the Earth Crystal extends to Lv8.
| Weapons | Rod, Staff |
|---|---|
| Armor | Body, Gloves, Helm, Shield |
| Magic | White Lv 7 |
| Stats @ Lv 50 | STR 24 · VIT 29 · AGI 29 · INT 21 · SPR 35 |
| Stats @ Lv 99 | STR 47 · VIT 58 · AGI 58 · INT 40 · SPR 66 |
| MP slots @ Lv 99 | 53 / 22 / 15 / 14 / 7 / 5 / 3 / 0 |
Black Mage
Wind Crystal
Dedicated Black Magic, Lv1-7. Equips rods and robes. Magus at the Earth Crystal extends to Lv8.
| Weapons | Arrow, Bow, Knife, Rod |
|---|---|
| Armor | Body, Gloves, Helm, Shield |
| Magic | Black Lv 7 |
| Stats @ Lv 50 | STR 24 · VIT 29 · AGI 29 · INT 35 · SPR 21 |
| Stats @ Lv 99 | STR 47 · VIT 58 · AGI 58 · INT 66 · SPR 40 |
| MP slots @ Lv 99 | 53 / 22 / 15 / 14 / 7 / 5 / 3 / 0 |
 Fire Crystal Jobs
Four jobs unlocked by the Fire Crystal in the Molten Cave. Knight is the Warrior’s direct upgrade; Thief, Ranger, and Scholar add utility and reach.
Thief
Fire Crystal
Has the Steal and Scram commands. Equips knives and light armor. Highest AGI tier of the Wind Crystal jobs.
| Weapons | Knife, Throwing |
|---|---|
| Armor | Body, Gloves, Helm, Shield |
| Stats @ Lv 50 | STR 29 · VIT 29 · AGI 47 · INT 21 · SPR 17 |
| Stats @ Lv 99 | STR 58 · VIT 58 · AGI 94 · INT 40 · SPR 33 |
Knight
Fire Crystal
Has the Guard command. Equips swords and heavy armor. STR/VIT both tier high. The mid-game front-line upgrade from Warrior.
| Weapons | Knife, Sword, Throwing |
|---|---|
| Armor | Body, Gloves, Helm, Shield |
| Stats @ Lv 50 | STR 41 · VIT 41 · AGI 29 · INT 21 · SPR 24 |
| Stats @ Lv 99 | STR 80 · VIT 80 · AGI 58 · INT 40 · SPR 47 |
Ranger
Fire Crystal
Has the Barrage command. Equips bows and light armor. AGI tiers high - the dedicated bow user.
| Weapons | Arrow, Bow |
|---|---|
| Armor | Body, Gloves, Helm, Shield |
| Stats @ Lv 50 | STR 33 · VIT 29 · AGI 41 · INT 21 · SPR 21 |
| Stats @ Lv 99 | STR 66 · VIT 58 · AGI 80 · INT 40 · SPR 40 |
Scholar
Fire Crystal
Has the Study and Alchemy commands. Equips books and robes. INT tiers high. Niche utility class.
| Weapons | Book |
|---|---|
| Armor | Body, Gloves, Helm, Shield |
| Stats @ Lv 50 | STR 33 · VIT 17 · AGI 33 · INT 52 · SPR 21 |
| Stats @ Lv 99 | STR 66 · VIT 33 · AGI 66 · INT 94 · SPR 40 |
 Water Crystal Jobs
Seven jobs unlocked by the Water Crystal in the Cave of Tides. The widest crystal payout in the game: physical upgrades (Black Belt, Dragoon, Viking, Dark Knight), the Geomancer’s terrain casting, the Bard’s songs, and the Evoker’s first random summons.
Black Belt
Water Crystal
Pure-damage class with Boost and Kick. The Black Belt can fight bare-handed; STR tiers high but armor access is limited.
| Weapons | Claw |
|---|---|
| Armor | Body, Gloves, Helm, Shield |
| Stats @ Lv 50 | STR 57 · VIT 52 · AGI 41 · INT 17 · SPR 17 |
| Stats @ Lv 99 | STR 94 · VIT 94 · AGI 80 · INT 33 · SPR 33 |
Geomancer
Water Crystal
Has the Terrain command. Equips bells and robes. Terrain casts a random map-themed attack with no MP cost; effects vary by current dungeon.
| Weapons | Bell |
|---|---|
| Armor | Body, Gloves, Helm, Shield |
| Stats @ Lv 50 | STR 24 · VIT 24 · AGI 33 · INT 35 · SPR 24 |
| Stats @ Lv 99 | STR 47 · VIT 47 · AGI 66 · INT 66 · SPR 47 |
Dragoon
Water Crystal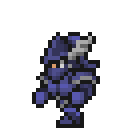
Has the Jump command. Equips spears and medium armor. STR and AGI both tier high - strong single-target physical.
| Weapons | Spear |
|---|---|
| Armor | Body, Gloves, Helm, Shield |
| Stats @ Lv 50 | STR 43 · VIT 29 · AGI 47 · INT 24 · SPR 24 |
| Stats @ Lv 99 | STR 80 · VIT 58 · AGI 94 · INT 47 · SPR 47 |
Viking
Water Crystal
Has the Draw Attacks command. Equips axes, hammers, heavy armor, shields. VIT tiers high - the dedicated tank.
| Weapons | Axe, Hammer |
|---|---|
| Armor | Body, Gloves, Helm, Shield |
| Stats @ Lv 50 | STR 39 · VIT 57 · AGI 21 · INT 21 · SPR 29 |
| Stats @ Lv 99 | STR 80 · VIT 94 · AGI 40 · INT 40 · SPR 58 |
Bard
Water Crystal
Has the Sing command. Equips harps and robes. Three harps in the game (Lamia, Madhura, Loki); the equipped harp determines the song's effect.
| Weapons | Harp |
|---|---|
| Armor | Body, Gloves, Helm, Shield |
| Stats @ Lv 50 | STR 21 · VIT 29 · AGI 33 · INT 29 · SPR 35 |
| Stats @ Lv 99 | STR 40 · VIT 58 · AGI 66 · INT 58 · SPR 66 |
Dark Knight
Water Crystal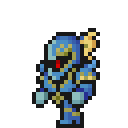
Has the Bladeblitz command. Equips dark swords and heavy armor. STR tiers high. Pixel Remaster's Bladeblitz replaces the NES-era Souleater command.
| Weapons | Katana, Sword, Throwing |
|---|---|
| Armor | Body, Gloves, Helm, Shield |
| Stats @ Lv 50 | STR 43 · VIT 33 · AGI 35 · INT 24 · SPR 24 |
| Stats @ Lv 99 | STR 80 · VIT 66 · AGI 66 · INT 47 · SPR 47 |
Evoker
Water Crystal
Casts Summon Lv1-8. Each cast resolves to one of two Evoker-tier outcomes (50/50). Equips rods and robes.
| Weapons | Rod |
|---|---|
| Armor | Body, Gloves, Helm, Shield |
| Magic | Summon Lv 8 |
| Stats @ Lv 50 | STR 29 · VIT 21 · AGI 24 · INT 33 · SPR 33 |
| Stats @ Lv 99 | STR 58 · VIT 40 · AGI 47 · INT 66 · SPR 66 |
| MP slots @ Lv 99 | 50 / 19 / 19 / 19 / 19 / 11 / 7 / 5 |
 Earth Crystal Jobs
Three jobs unlocked by the Earth Crystal in the Ancient Ruins: the magic-school upgrades. Devout takes the White Mage to Lv 8, Magus does the same for Black, and Summoner replaces the Evoker’s random rolls with deterministic strongest-outcome casts on the Summons page.
Devout
Earth Crystal
White Magic Lv1-8 specialist. Equips staves and robes. Adds the Lv8 White spells over White Mage's Lv7 cap. Found in Eureka.
| Weapons | Rod, Staff |
|---|---|
| Armor | Body, Gloves, Helm, Shield |
| Magic | White Lv 8 |
| Stats @ Lv 50 | STR 21 · VIT 32 · AGI 29 · INT 24 · SPR 57 |
| Stats @ Lv 99 | STR 40 · VIT 66 · AGI 58 · INT 47 · SPR 94 |
| MP slots @ Lv 99 | 32 / 15 / 13 / 10 / 18 / 16 / 11 / 10 |
Magus
Earth Crystal
Black Magic Lv1-8 specialist. Equips rods and robes. Adds the Lv8 Black spells over Black Mage's Lv7 cap. Found in Eureka.
| Weapons | Rod |
|---|---|
| Armor | Body, Gloves, Helm, Shield |
| Magic | Black Lv 8 |
| Stats @ Lv 50 | STR 21 · VIT 39 · AGI 29 · INT 57 · SPR 24 |
| Stats @ Lv 99 | STR 40 · VIT 80 · AGI 58 · INT 94 · SPR 47 |
| MP slots @ Lv 99 | 32 / 15 / 13 / 10 / 18 / 16 / 11 / 10 |
Summoner
Earth Crystal
Casts Summon Lv1-8 with the single strongest fixed outcome per spell (Diamond Dust, Hellfire, Mega Flare). Equips rods and robes. INT and SPR both tier high. Found in Eureka.
| Weapons | Rod |
|---|---|
| Armor | Body, Gloves, Helm, Shield |
| Magic | Summon Lv 8 |
| Stats @ Lv 50 | STR 21 · VIT 24 · AGI 35 · INT 41 · SPR 41 |
| Stats @ Lv 99 | STR 40 · VIT 47 · AGI 66 · INT 80 · SPR 80 |
| MP slots @ Lv 99 | 50 / 19 / 19 / 19 / 19 / 11 / 7 / 5 |
Eureka Jobs
Two jobs unlocked inside Eureka (the optional dungeon hidden in Crystal Tower 1F). Both are best-in-slot endgame classes: Sage casts every school at Lv 8 from one shared MP pool, Ninja throws Shurikens for 9,999 damage and wears almost every weapon and armor in the game.
Ninja
Eureka Crystal
Endgame physical class. Equips swords, knives, katanas, claws, and most armor types; STR and AGI both tier high. Throw lets the Ninja launch Shurikens or other inventory weapons at one enemy. Found in Eureka.
| Weapons | Arrow, Axe, Bell, Book, Bow, Claw, Hammer, Harp, Katana, Knife, Nunchaku, Rod, Spear, Staff, Sword, Throwing |
|---|---|
| Armor | Body, Gloves, Helm, Shield |
| Stats @ Lv 50 | STR 57 · VIT 33 · AGI 57 · INT 24 · SPR 24 |
| Stats @ Lv 99 | STR 94 · VIT 66 · AGI 94 · INT 47 · SPR 47 |
Sage
Eureka Crystal
Casts all three magic schools at Lv 1-8 from a single shared MP pool, with smaller slots per level than the dedicated specialists. INT and SPR both tier high. The Sage's Summon command uses the Summoner outcome table (always lands the strongest summon effect). Found in Eureka.
| Weapons | Book, Rod, Staff |
|---|---|
| Armor | Body, Gloves, Helm, Shield |
| Magic | White Lv 8, Black Lv 8, Summon Lv 8 |
| Stats @ Lv 50 | STR 17 · VIT 32 · AGI 29 · INT 43 · SPR 43 |
| Stats @ Lv 99 | STR 33 · VIT 66 · AGI 58 · INT 80 · SPR 80 |
| MP slots @ Lv 99 | 25 / 22 / 19 / 15 / 12 / 9 / 7 / 6 |