


Ancients' Maze
The Ancients’ Maze is the last dungeon before the Crystal Tower. Four overworld enemies need registering around the entrance, and inside the maze waits the full Crystal armor set plus six tougher bestiary entries. The Earth Crystal chamber from the Cave of Shadows chapter still fully heals on contact, so use it as a free pit stop between fights. This chapter covers 15 chests and 10 new bestiary entries.
Outside the maze
Four new enemies roam the overworld grass and forest around the maze entrance. Farm them all before stepping inside.
New Enemies

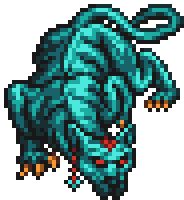

- Death Needle, Liger, and Minotaur are pure physical brawlers with no exploitable weakness.
- Aeon is the rare outlier. It rolls Earthquake on 30% of turns (party-wide Earth damage) and resists Earth itself.
Ancients’ Maze
Six new bestiary entries fill the maze, and several hit harder than anything outside a boss fight.
New Enemies


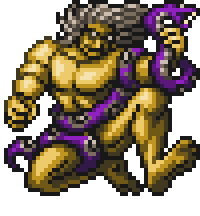
- Greater Demon summons Iron Claws mid-fight and is weak to Holy; drop it first with a Devout’s Holy or the Ancient Sword.
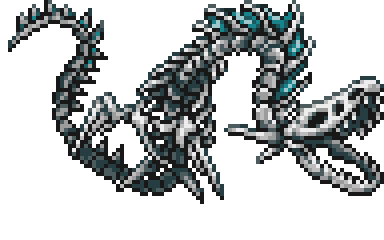
- Bone Dragon is weak to Holy too. Curaja does over 9,000 damage to undead, the fastest way to clear it. Skip Blood Sword and Blood Lance here; their HP drain heals undead instead of damaging.
- Thanatos rolls Breakga on 20% of turns; stock Gold Needles or kill it first.
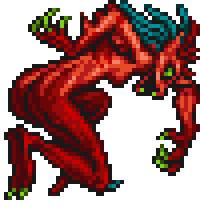
- Unei’s Clone rolls Icestorm on 30% and casts Reflect + Tornado sometimes. She also flees the battle past level 50, so don’t dawdle if you need her in the bestiary.
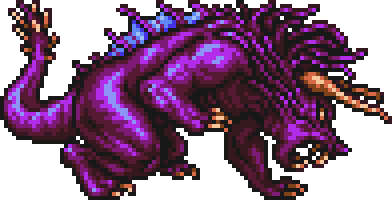
- King Behemoth is the rare 5% spawn with 17,000 HP and casts Meteor on every turn once low; burst it down fast once you commit.
- Iron Claws is the easiest of the bunch, pure physical with no tricks.
Entry area. Walk north around the Earth Crystal room. At the top of the screen, take the east branch for an Elixir. Return west and pass through the door into the maze proper.
First forks. Walk north to the first fork and continue north for a Lilith’s Kiss and Crystal Shield. Backtrack and take the west branch instead. At the next fork, go north for Crystal Mail. Return to the fork, continue west, and grab the Black Musk when a chest appears to the south.
West wall. Continue east, then head north along the west wall until you can’t go further. Go east for Crystal Gloves. Backtrack south to the last split, then east down a long path until you hit a four-way intersection.
Four-way fork. West leads to a Crystal Helm. Backtrack and take the south branch; the south wall breaks into a hidden passage to three chests: Break Blade, Phoenix Down, and Omnirod. The Omnirod is the strongest rod in the game; equip it on your Magus. Return to the four-way and take the east branch for a Dual Haken.
Northeast maze. From the four-way, head east and follow the path until it hits another fork. Go south, east, then north for a Protect Ring, one of the strongest accessories in the game (blocks instant-death effects); equip it immediately. From there, go east, north, and east again for a Phoenix Down.
Final room. From the last chest, drift west, then south along the east wall. Follow the long winding path (east, then a long stretch west) until you reach a door. Inside, grab the Holy Lance on the left and Hellish Claws on the right. All 15 chests cleared.
Exit through the north door to return to the overworld, then head to the Crystal Tower when ready.