


Deist Cavern
The wyvern at Castle Deist can’t speak to humans, but a Pendant hidden in Deist Cavern fixes that. This chapter covers Deist Cavern for 13 chests and 8 new bestiary entries.
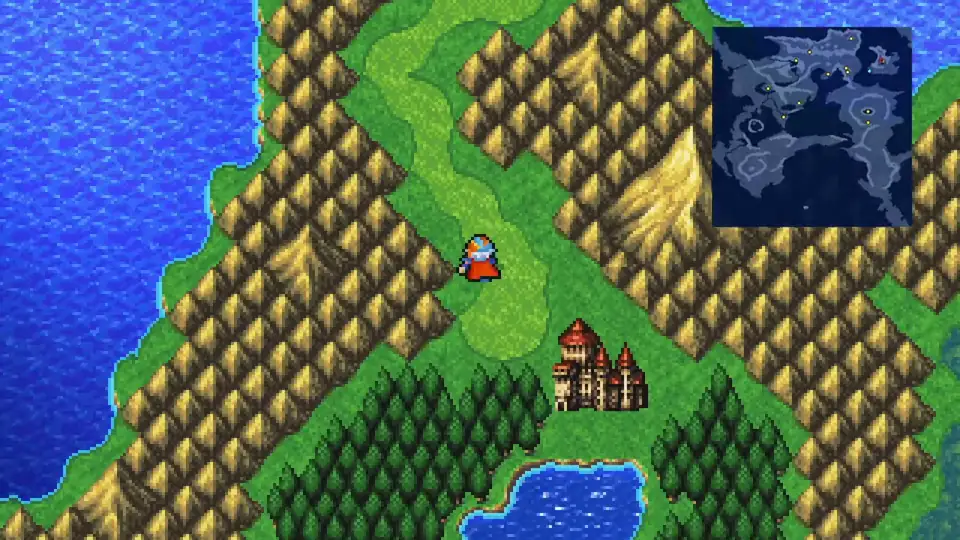
Deist Cavern - The Pendant
Exit Castle Deist and walk directly north through the mountains. Deist Cavern sits at the base of the range, less than a minute’s walk away.
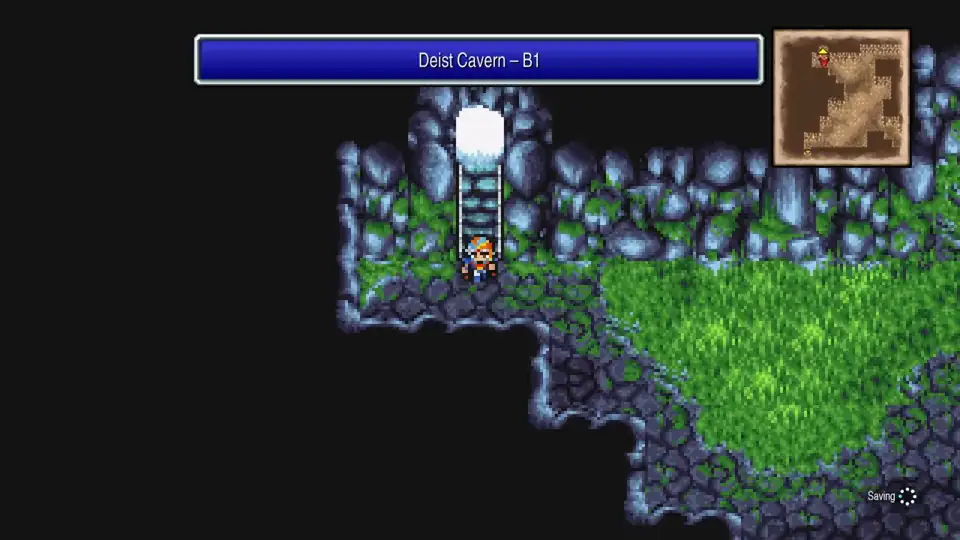
Inside the cavern, there’s a chest immediately to your right with 230 Gil. Walk to the top-right corner of B1 and descend the stairs; the Pendant is one floor down. Grab it and leave; you’ll come back for the rest of the dungeon after talking to the wyvern.
Return to Castle Deist
Back at the castle, enter the room next to the mother and child. A dying wyvern rests inside, and the Pendant lets you understand its speech. Ask about Dragoons and Wyverns to learn what happened. The Empire poisoned the water, killing nearly every wyvern; this one is the last.
Before it dies, the wyvern gives you a Wyvern Egg and asks you to submerge it in the Life Spring deep within Deist Cavern. Return to the dungeon for the full clear.
Deist Cavern - Full Exploration
This dungeon has 5 floors and 13 chests in total. You already grabbed the 230 Gil on B1, so 12 remain. The route forks into two: bottom-left stairs lead to B5’s dead-end treasure room (chests 2-6), and bottom-right stairs head down to the Life Spring boss fight (chests 7-13 on the way).
New Enemies


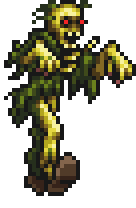


Ogre Chiefs (300 HP) hit harder than regular Ogres and show up reliably from B3 on. Revenants (240 HP, weak Fire) are undead and take heavy damage from multi-target Fire. Gigantoads (450 HP, weak Ice) can inflict Toad status, which disables a party member until cured with a Maiden’s Kiss or Esuna Lv5+. Green Souls (6 HP) cast Cure on their pack, so kill them first to stop the heal chain. Yellow Souls (20 HP) cast Lv5 Fire; both Soul types die in one hit. Stalactites (240 HP) are passive ceiling-dwellers on B1, B4, and B5; two physical hits drop them.
Route 1: B5 Dead-End Treasure Room
From B1, take the bottom-left stairs to B2. Head right and grab the Ether chest, then descend the stairs to the right of it. The path is linear from here through B3 and B4, eventually dropping you at a dead end on B5.
Four chests sit at the dead end: Knight’s Armor (the 4 Adamantoises guarding it have high physical defense, so use Ice magic), Saint’s Spirit, Sage’s Wisdom, and the Flame Bow.
Teleport out or walk back to B1, then re-enter for the second route.
Route 2: Path to the Life Spring
From B1, take the bottom-right stairs.
B2. Follow the corridor until you reach the top of the floor. Take the first passage going down for the Mythril Helm, then loop back and follow the north passage for the Mythril Armor. From there, push south and descend to B3.
B3. Do not cross the bridge; it collapses and drops you to a lower floor, forcing a long backtrack. Grab the Mythril Gloves and Mythril Mirror from this isolated island, then head back the way you came to B2.
B2 again. Walk straight up and take the first left. Follow the corridor down to the Mage’s Staff chest, guarded by 5 Green Souls. Continue north and descend to B3.
B3. The Mythril Shield chest is right there when you arrive. Head north but don’t cross the bridge; instead follow the northern corridor around to some steps leading down to B4.
B4. The Acid Phial chest sits on the left side of the room. That’s all 13 chests collected. Take the stairs down to B5 for the boss.
B5. Follow the corridor until you see four doors in a row. Enter the third one from the left to reach the Life Spring.
How to Beat Chimera
After the fight, approach the Life Spring and use the Wyvern Egg from your inventory. The egg sinks into the water; it won’t hatch anytime soon, but you’ve done your part. Teleport out if you have the MP, otherwise walk back to the entrance.
Return to Altair
Board your ship and sail back to Altair. Make sure Basuna is at level 6 or higher before going into the rebel hideout.
In the hideout, go upstairs and skip the first room. Enter the second room instead, where Hilda invites Firion in for a private conversation. Something feels wrong. The “Hilda” you rescued from the Dreadnought was actually the Lamia Queen in disguise; she reveals her true form and attacks.
How to Beat Lamia Queen
After the fight, a rebel soldier arrives with news: the Empire is holding gladiatorial games and the real Princess Hilda is being offered as the prize. Leila leaves your party here, but Gordon rejoins to fill the fourth slot. His stats haven’t improved since Castle Deist, so re-equip him with the Mythril gear from this dungeon and give him a shield for the extra defense.
The next chapter heads to the Coliseum to rescue the real Hilda. Stock Potions and Phoenix Downs before heading out.